I was very excited when this book was in my list of review options since it's historical fiction. If you've read some of my previous book reviews you know this is one of my favorite genres.
As I started reading, I was slightly disappointed. I could NOT get into this book! The chapters are each only a few pages long and after just one chapter I'd put the book down and walk away. I never do that! Honestly, I can't quite figure out what my problem was with the book. It was a decent story, just not captivating. When I finally got interested in the book (at the very end) and kept reading and reading to find out what happened to a specific character, he went away and the author never says what happened to him! There is a sequel to this book called "Mine is the Night", however, I don't think I want to read through it with the sheer hope that she brings the character back.
Here is the summary from the back of the book:
"Lady Elisabeth Kerr is a keeper of secrets. A Highlander by birth and a Lowlander by marriage, she honors the auld ways, even as doubts and fears stir deep within her.
Her husband, Lord Donald, has secrets of his own, well hidden from the household, yet whispered among the town gossips.
His mother, the dowager Lady Marjory, hides gold beneath her floor and guilt inside her heart. Though her two abiding passions are maintaining her place in society and coddling her grown sons, Marjory's many regrets, buried in Greyfriars Churchyard, continue to plague her.
One by one the Kerr family secrets begin to surface, even as bonny Prince Charlie and his rebel army ride into Edinburgh in September 1745, intent on capturing the crown.
A timeless story of love and betrayal, loss and redemption, flickering against the vivid backdrop of eighteenth-century Scotland, Here Burns My Candle illuminates the dark side of human nature, even as hope, the brightest of tapers, lights the way home."
An excerpt from the book can be found HERE.
If you decide to read this, let me know what you thought!
As a reminder, I was given this book for free from the WaterBrook Multnomah "Blogging for Books" program. All opinions are my own.


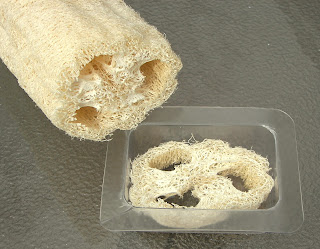
 Now you're ready to pour the melted soap base on top of the first layer but first, spritz a bit of the rubbing alcohol onto the first layer to help them adhere.

